

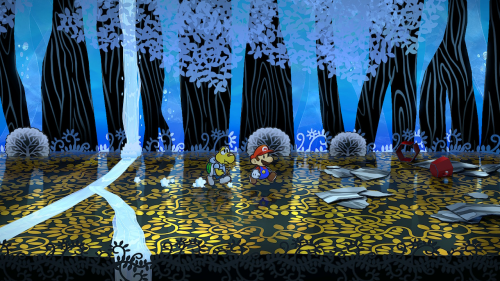
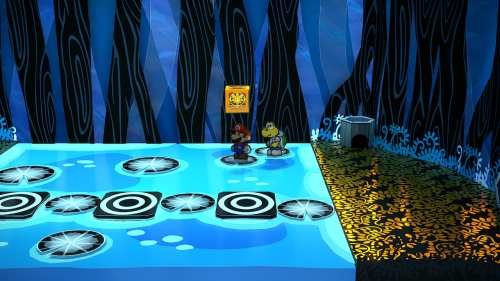
After exiting the warp pipe you'll find yourself in Boggly Woods with Punio. Walk right a screen and you'll hear a conversation from the Three Shadows about waiting to ambush you, but they don't actually know what Mario looks like as they've misplaced a sketch of him. You can even talk to them and they won't recognize you.

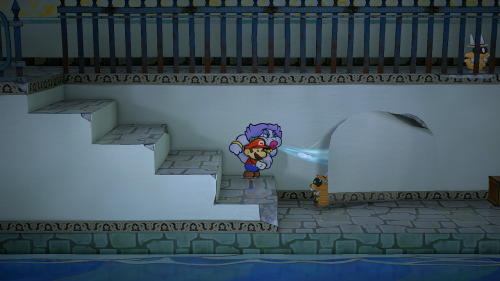
Continue to the right and you'll find a couple new enemies on this screen. Make sure to use Tattle on them to add to your log. Note that the Bald Cleft enemies have 2 defense and can't be jumped on, so your normal attacks can't damage them. There are a few badges (like Piercing Blow) that will let you damage them, as well as a variety of non-fire items. Continue to the right a screen and follow Punio into stump/pipe.

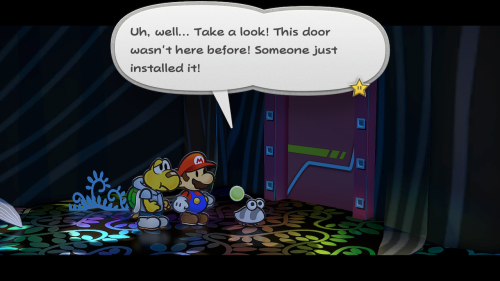
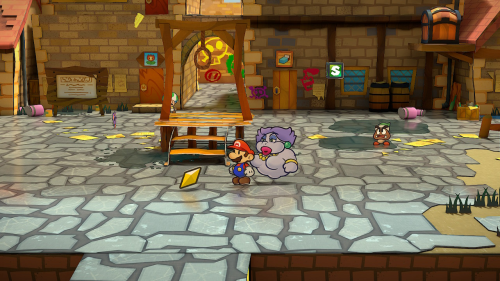
The pipe leads you to the background where you can enter the Great Tree area. Unfortunately, it seems that a locked door has been installed on the outside of the tree preventing access. There is a secret entrance, but to enter it we'll need the help of someone named Madame Flurrie. We'll need to go find her in Boggly Woods.

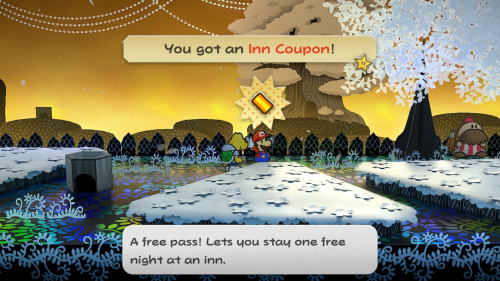
Head to the right and pick up the Inn Coupon on the ground. There is also a merchant nearby if you need to stock up on items. On the next screen, you'll see a pipe that brings you up to an airplane panel. Ignore this for now and head to the right. There is a hidden staircase in the wall on the right that takes you to the ledge in the background. Follow it and hit the blue switch to raise the airplane panel platform much higher.

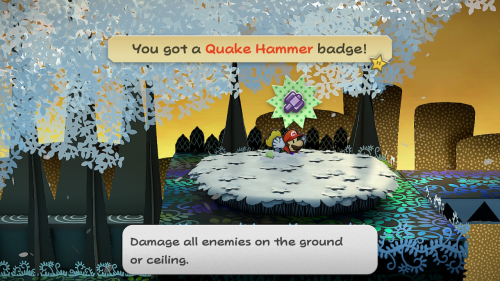
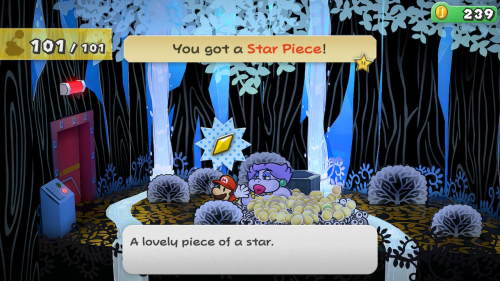
Just to the left of the blue switch on this ledge you can find Star Piece #21. Hop down and enter the now taller pipe. Use Koops's shell attack to hit the box to the left and get Shine Sprite #5. You can then use the panel to fly to the right and land on the higher section. After you land make sure to collect the Quake Hammer badge from the red box here.

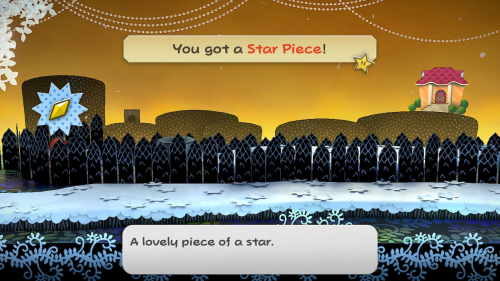
On the next screen you will see three trees before the fence. Whack the one on the right to find Star Piece #22. Continue to the right and you'll see a gap in the fence that you can use paper mode to slip through. If you search in front of the tree to the right you can also find a Volt Shroom. All the way to the left of the pipe behind the fence you can also find Star Piece #23.

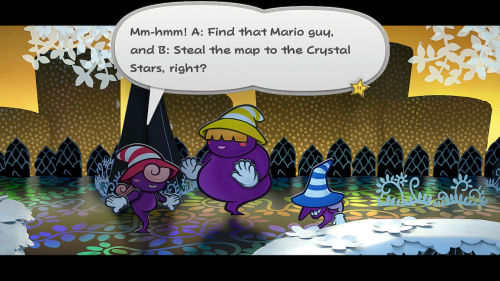
Enter the pipe to warp to the background and enter Madame Flurrie's house. Try to go through her door and she'll let you know that she would love to help, but she can't be seen without her necklace. This of course means we'll need to go get it from the Three Shadows. When you exit the house, you'll see a cutscene with the shadows showing that they found the sketch and will now recognize you when they see you.
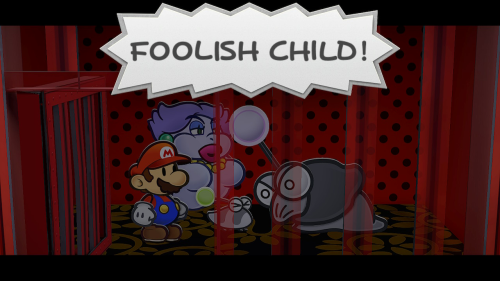
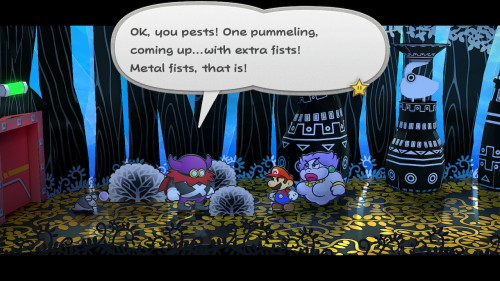
Backtrack to the left to the area where you last saw the Three Shadows. Make sure you're properly healed and use a save block before approaching them. When you do, they'll want to fight you to get your map.

This will be the toughest fight of the game so far, but it's still very manageable. The tricky thing is that you'll need to spend three turns with Gombella tattling if you want them in your log. Besides that you should make use of Koops's power shell to damage all three and if you are turned small it's a good opportunity to use an item like Fire Flower that won't be affected by the attack nerf. If you have it equipped and have the timing down well, Power Bounce is also a great option to deal a ton of damage in this fight.

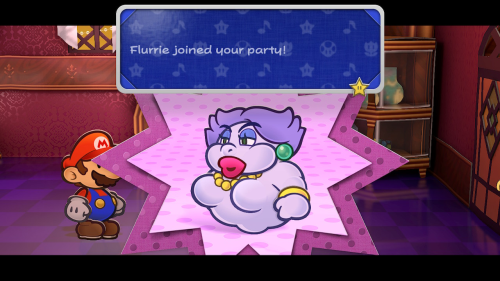
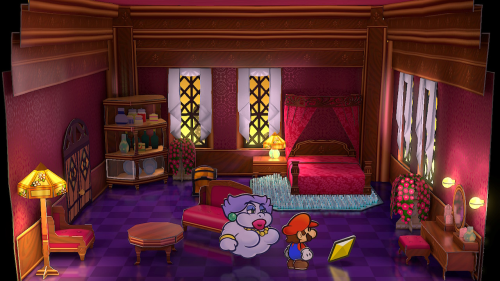
After the battle, the Three Shadows will leave behind the Necklace for you. Now make your way all the way back to Madame Flurrie's house to deliver her the necklace. After you return it Flurrie will reward you with a big smooch. More importantly, she's looking for adventure and wants to join your party! You'll get a little tutorial on how to use her wind blowing ability.

With a new partner by your side, head back to the Great Tree. When you get there, climb up the root and use Flurrie's gust ability to reveal the secret entrance on the trunk. Punio will then use the secret entrance to get inside and unlock the door below. You can then use the door to enter.

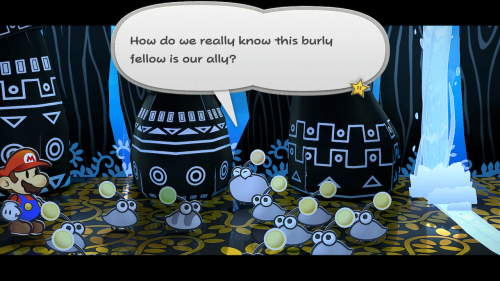
Once inside, you'll find that the Punies seem to be gone but there are some X-Nauts in their place. There are two that you'll need to defeat right away. Afterward, some of the Punies that haven't been captured will come out from hiding, including one named Puniper who is very skeptical of Mario. They won't trust you until you free some of the captured Punies, so you'll have to leave them for now.

Enter the pipe here to reach the second floor and then another to reach the third floor. There are some more enemies in this room, including the new Yux. Make sure to Tattle to add them to your log. Take the pipe up here to reach the upper part of this room. Then take one more pipe up to the fourth floor.

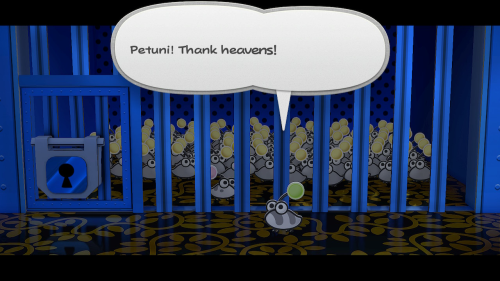
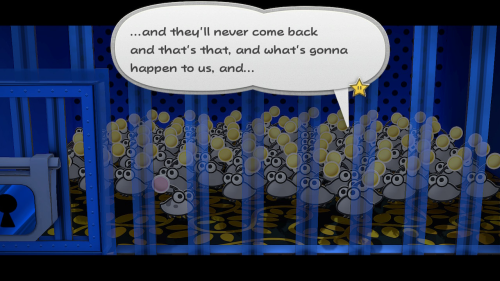
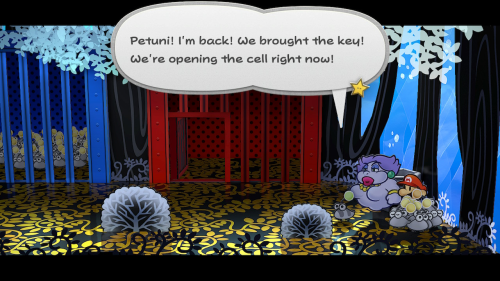
Here you will find the Puni Elder locked in a jail cell. In an adjacent cell are the rest of the Punies, including Punio's sister Petunia. You'll need to find the keys to unlock the cells, so head to the left for now.

When you do, you'll see a cutscene where an X-Naut guarding the cell key is attacked by Ms. Mowz, who runs off with another badge. You'll then need to defeat the X-Naut to collect the Red Key. Head back to the right and use it to free the Puni Elder. When you do, Punio will receive a long lecture from the rather grumpy old Elder.

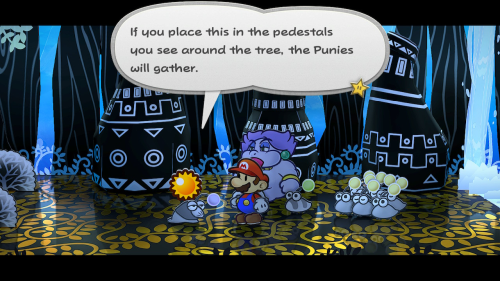
Backtrack all the way to the first floor to the room with Puniper. He is still hesitant, but with some persuasion from the Elder him and ten other Punies will agree to join you. You'll also get the Puni Orb from the Elder, which is needed for some of the puzzles here.

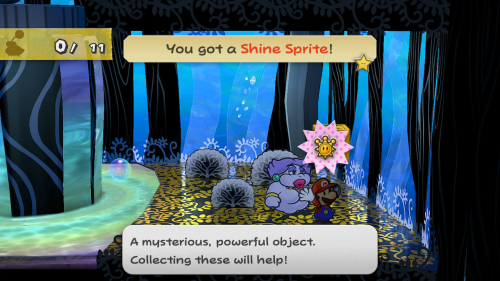
Use the pipe to go back to the second floor and place the Puni Orb in the pedestal that you see. This will cause the switch to lower and a new pipe to appear. Enter that pipe and defeat the enemy in this next room. The first thing to do in the next room is to drop down to the lower area where you'll find Shine Sprite #6.

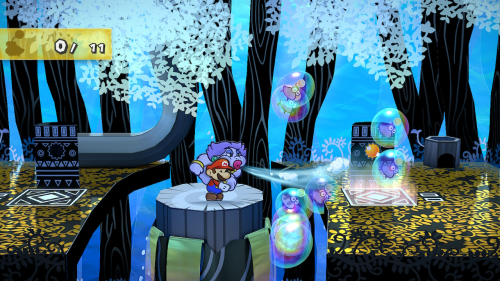
Use the pipe to get back up and place the orb in the pedestal here. Then use Flurrie to blow all the Punies into the water. Then quickly jump across to the right and move the orb to the other pedestal. This will cause the Punies in the bubbles to be attracted to this side instead. You may have to blow them off again from the middle platform if they didn't all make it to the right side. Once you have all 11 Punies with you, enter the pipe on the right side.

In this upper area you'll encounter new enemies that drop down from the ceiling called Piders. You'll need to defeat all these (make sure to Tattle) because the Punies are afraid of them and will run away when they see one. Don't worry if some fall off, as we'll be heading down below soon. While we're up here, use Flurrie to blow the large pot off of the airplane panel.


You can now use the airplane panel to reach the right side of the room where you'll land on another airplane panel. Use it to reach the left side of the room where you'll find Shine Sprite #7. Make sure to go back up and collect all the Punies, then come back down to the bottom via the pipe. Defeat the enemies in this room and then enter another pipe once you have all 11 Punies with you.


When you get to this room you'll see a Jabbi with the blue key fly away to the right. Before following it to the right, we want to head to the left intead. There is a narrow winding path that Piders will drop down near to scare your Punies off the ledge. If you are quick enough you can attack them with Koop's shell to prevent this. Take out the Piders and you'll see a red block between the sections of the path. Use Koops's shell to reveal a hidden block below it. You can then jump over there and hit the block to find the Damage Dodge P badge.

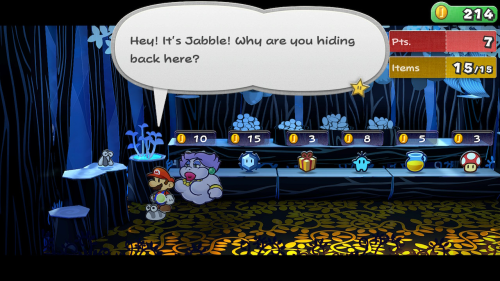
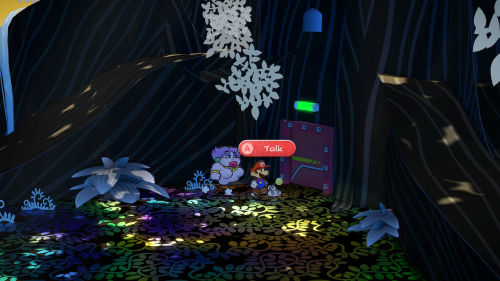
Drop down below and whack the bush closest to the save block to find Star Piece #24. Head to the left and use Flurrie's wind to blow down the paper on the left wall. This will reveal the entrance to a secret shop. On the left side of the shop you can find a small Jabbi hiding behind a trunk. If you are nice to him, Jabble will become your ally.


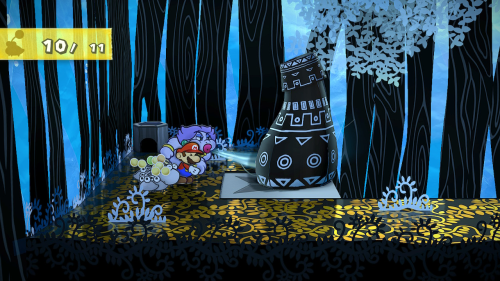
You can stock up on any items you need here and heal using the block to the right if you need to. Otherwise just head to the right back to where we saw the Jabbi fly off with the key earlier. Head into the room to the right and you'll run into a group of Jabbies alerted by an alarm. They will attack you and you'll need to use Flurrie's wind ability to get rid of them. Afteward the Punies will destroy the Jabbi hive and you can continue to the right.
In this next room you'll find a chest containing the Blue Key. Exit the room the way you came and you'll see a cutscene where the captured Punies anxiously await their rescue. It's time to head back up to them. Start by taking the pipes up back to the first floor.

When you get to the bubble room, you'll need to repeat the process of using the bubbles to get the Punies across from earlier. Place the orb on the left side and blow them into the bubbles. Take them all up the pipe to the second floor, then take the pipe to your right up to the third floor. Keep following the pipes up one more floor to reach the jail room.

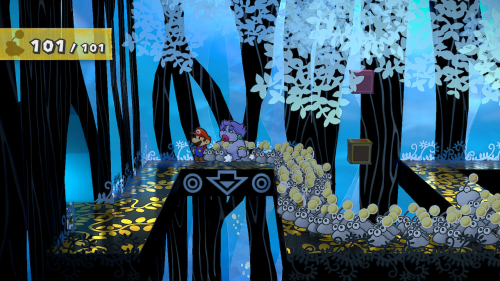
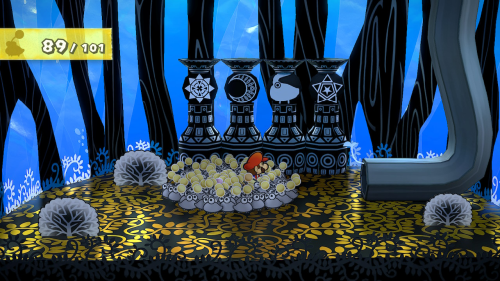
Use your key to open the cell and free the rest of the Punies. There will be a sweet cutscene where Punio and Petunia reunite and Punio eats a rancid mushroom. You will then have a full 101 Punies in your party. With the full squad on deck, make your way back to the room with the narrow winding path we were just at.

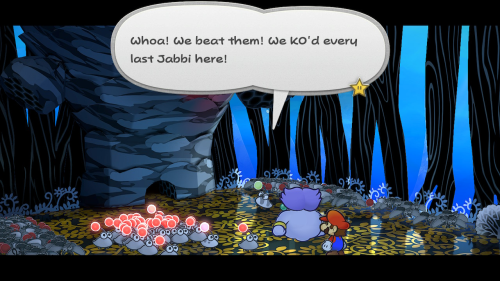
Once you get to the winding path room, follow the path all the way to the left. You'll run into a similar Jabbi hive as before, but this time there are 100 Jabbies. We still (slightly) outnumber them, but you'll need to make use of Flurrie's wind to win the fight. The Punies will then destroy the Jabbi base, opening up a path to the left.

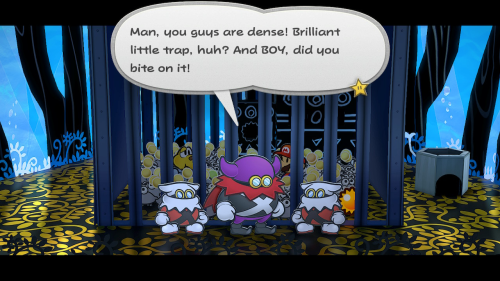
Defeat the enemies in this next room and head down the pipe. Check behind the long pipe down here to find Star Piece #25. Enter the next room and place the orb to attact all the Punies. Uh-oh, it was a trap! The X-Nauts will drop a large cage over you and all the Punies. Pick up the Puni Orb once again and use your paper mode ability to sneak out.

Head down the pipe to the right. Check behind the long pipe in here to find Star Piece #26. Whack the switch in this room and it will spawn four other switches in a room above. You'll need to note the pattern on the columns in this room: sun, moon, Puni, and star. Backtrack to the room with the winding narrow path. Head right past where you fought the 10 Jabbie horde before.

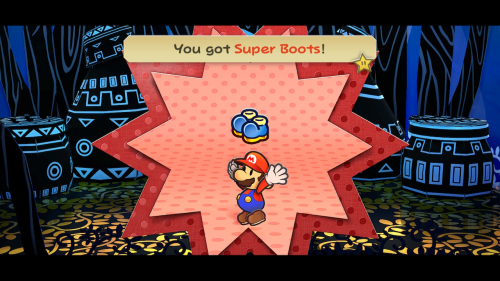
In this room you'll see four columns and four switches. You'll need to make them match the order of symbols shown in the other room (sun, moon, Puni, and star). Once you do, the pillars will dissapear and a path forward will emerge. Open the chest in this room to get the Super Boots. Toadette will appear and teach you how to use this to perform the spin jump (ground pound). This allows you to break through certain areas on the ground. In addition, your jumps in battle will now be more powerful.


Head back to the previous room and use your ground pound to break through the panel on the floor. You'll then need to carefully jump across the platforms to reach Shine Sprite #8 in the back of the room. Jump back across all the platforms and use Koops's shell to pick up a Charge badge.

Take the pipe up in this room and head left to backtrack all the way to the room with a pedestal and another breakable wooden panel. Use a ground pound to break through it and you'll land on a stump with a pipe we couldn't reach before. Defeat the enemies in this room and then take the pipe down below.

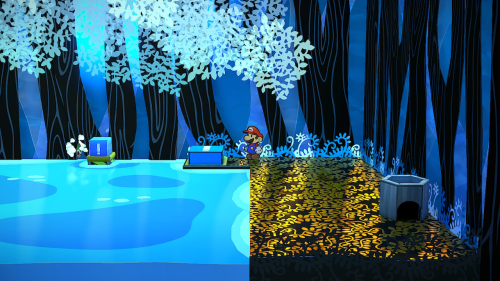
This next room is full of water. You'll need to take the pipe down to the room below the water first. Ignore the Shine Sprite in here for now and just jump across the platforms and enter the pipe to the right. You'll now be on the right side of the water in the room above. Step on the large switch here and charge Koops's shell attack to the left of the switch that lowers. Remove Mario from the large switch to raise the smaller one and let Koops hit it. This will drain the water from this room into the one below it.

Jump down into the basin where the water was and you can find the Shrink Stomp badge from a chest. You can also check behind the staircase to find a Dizzy Dial. Use the pipe to reach the room below once again. With water in this room, the lily pads will have raised meaning you can reach Shine Sprite #9. You now need to return to the room with the trapped Punies, so start by heading up several pipes back to sublevel two.

Once you are on the giant stump, head to the right to find the trapped Punies. Use paper mode to enter the cage and then do a ground pound on the left side to break through a wooden panel. The Punies won't jump down with you, so you'll need to use the pipe to head back up and enter the cage again. You can now place the Puni Orb and then use Flurrie's gust to blow them down into the hole. You can then go down and retrieve them and bring them back up so that all 101 are outside of the cage.

Head back up to the room above the giant stump and place the Puni Orb in the pedestal. Use Flurrie's gust to blow all the Punies down so that they land on the giant stump. Enter the pipe on the stump and navigate back through these rooms to the room with the water. Lead the Punies across the water and down the next pipe. Place the Puni Orb in the pedestal to activate an elevator that takes you down below to sublevel five.

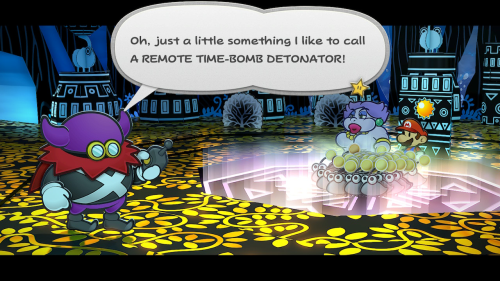
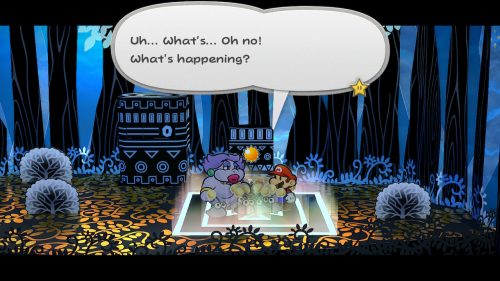
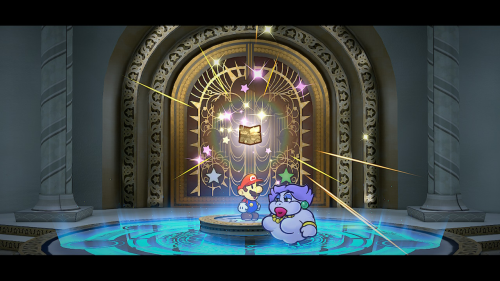
Make sure to use the save block and heal up if you need to. You can also pick up a Mushroom from a bush in this room. Then head to the room to the right. Place the Puni Orb in this room and the Crystal Star will briefly appear, before being snatched by Lord Crump. He then triggers a remote time bomb that gives you 300 seconds to escape the Great Tree before it explodes.

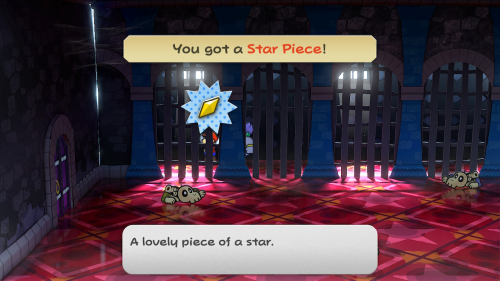
Follow Lord Crunk using the pipe that he uses and you'll immediately be ambushed by a few X-Nauts. Note that the timer is still ticking down during this battle, so you'll need to hurry. After defeating them whack the bush directly to your left to find Star Piece #27. You can then use the switch to open the door and leave this room.

You'll then want to take the next several pipes upward. You'll eventually reach the bubble room on the first floor, where you'll once again have to use the Puni Orb and Flurrie's gust to push all of the Punies across the gap. Use the switch and open the door to your left. In this room you'll see that the Puni Elder has stopped Lord Crump from going any further. He will stop the timer out of self preservation and prepare to battle you.

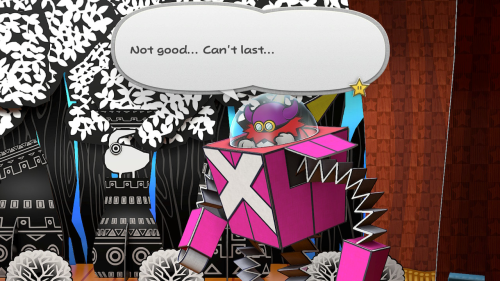
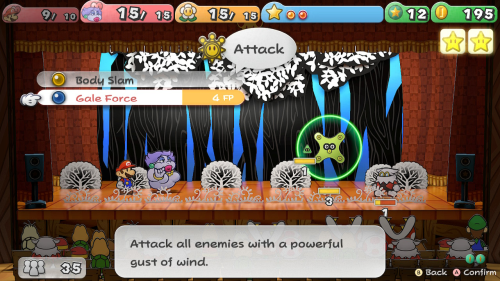
For this boss fight, Lord Crump will fight you in a giant mech called Magnus von Grapple. Make sure to use Tattle early on in the battle. Whenever he summons his fists make sure to take them out right away as they can deal massive damage. Otherwise your jump attacks on his chest will likely be the best way to deal damage, depending on the badges that you have equipped. His main attacks are a stomp where he runs up to you and does two fake outs, and a ground stomp that damages all party members.

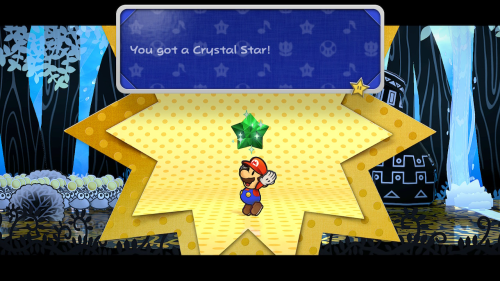
After you win the battle Lord Crump will flee along with the rest of the X-Nauts. The Puni Elder will then award you with the emerald Crystal Star. Your star power will also increase and you'll learn the special move Clock Out. This move costs two SP and lets you throw a large bomb at an enemy that can immobolize them.

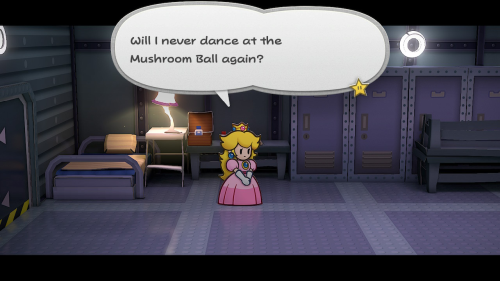
Back at the X-Naut hideout, Sir Grodus will get a report on Mario's success in obtaining the Crystal Star. You will then take control of Peach back in her room. Try using the broom to open the door again, but it doesn't work this time. However, when you head back to the left the door will open on its own.

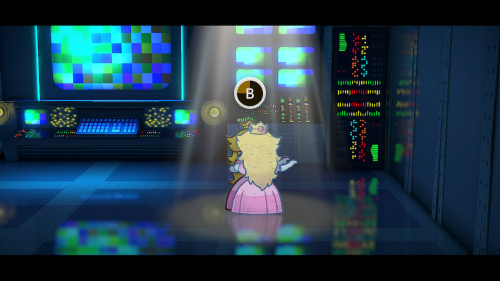
Continue right through the hallway and back to the room with TEC the computer. It will admit to eavesdropping and wants to try dancing with you. It will create a hologram Peach that you'll need to dance with by pressing the buttons as you are prompted. Afterward, TEC will allow Peach to send out another message as a thank you and then sends her back to her room.

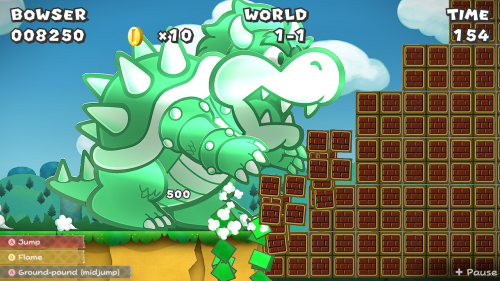
Bowser seems to be one step behind and is looking for Mario and Peach in Petalburg. To get there, you get to play a fun platforming sequence in the style of a 2D Mario game as bowser. Once Bowser arrives into town he is promptly tricked by a poster that he thinks is Princess Peach. That serves as the end of your time as Bowser for now.

After the Punies bid you farewell, you should actually immediately re-enter the Great Tree. Head up to the second floor to the room with the 10 Puni pedestal and do a ground pound to the right to find Star Piece #28. Take the next few pipes up to the fourth floor to the room with the jail cells. Inside the blue cell you can ground pound a loose floor panel to find Star Piece #29.

Exit the Great Tree and begin heading left back towards Rogueport. When you get back to the Boggly Woods you'll get an email from Peach. It doesn't say much, just that she is mostly fine and misses Mario. Continue to the left and exit the woods. As soon as you are back in the sewers, you can ground pound to the left of the pipe in the small room to find Star Piece #30.

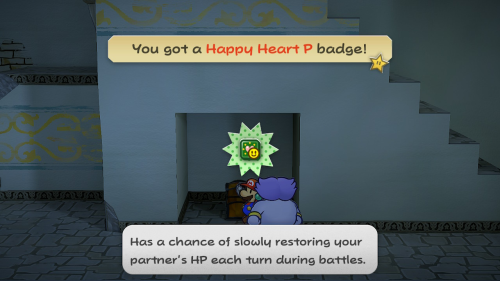
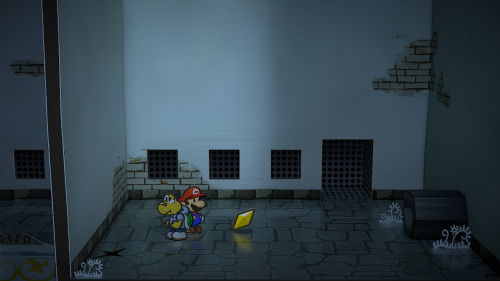
Now that we have the spin jump (ground pound), there are many star pieces that we can collect. If you aren't interested in collecting them all, feel free to skip some of this section. To begin, exit this area through the grates and then head right up the staircase and into the room where you were cursed by the black chest earlier. Ground pound in front of this chest to find Star Piece #31. When you are coming back down the staircase, you may notice a peeled piece of paper. Use Flurrie's gust to blow it away and you can find the Happy Heart P badge in a chest.

Head up the pipe in this room to sublevel two. You'll notice another paper on the wall to the left. Use Flurrie's gust to blow it off and it will reveal a door that is another entrance to the warp pipe room. Ignore it for now and continue up to the next level of the sewers. On sublevel one, hop down below the moving platform and ground pound in the center to find Star Piece #32. You can then exit the sewers using the pipe to your left.

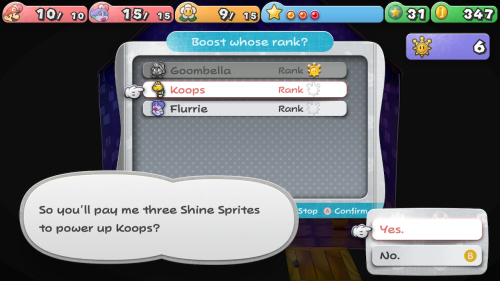
Back in Rogueport, ground pound in front of Professor Frankly's house to find Star Piece #33. While you are here, it's a good opportunity to enter Merlon's house and upgrade your partners. You should have collected a total of 9 Shine Sprites by this point, which is enough to upgrade each of your partners one time.

Head back to the central plaza and you'll see Luigi to the right. Feel free to talk to him and catch up on his adventure stories if you'd like. Head to the center of the plaza in front of the gallows and ground pound to find Star Piece #34.

Head down to the docks and ground pound to the left of the staircase to find Star Piece #35. Head back up to the central plaza and then to the back alley. Head to the right back here and ground pound behind the goomba to find Star Piece #36 in a hidden floor panel. Exit the alley and then head left to West Rogueport.

Head left in front of the Pianta Parlor and ground pound to find Star Piece #37. While you're over here you might as well check your lottery ticket and see if you've won any prizes. Head north to the train station area. Head as far left as you can along the train and then ground pound to the right of the orange Toadette. This will reveal Star Piece #38 in a hidden floor panel.

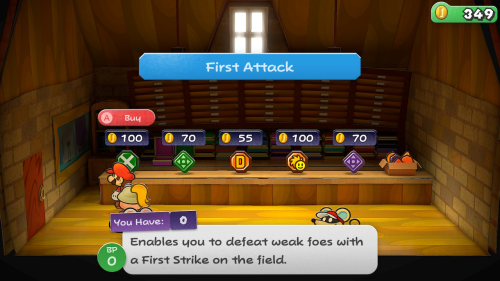
While we are in town, it's a good idea to buy any useful badges that you might want. Most importantly the First Attack badge is now available for 100 coins from the Lovely Howz of Badges, to the left of the second floor of the Inn. This badge costs 0 BP to wear and lets you defeat weak enemies with a single first strike, saving you time when backtracking.

Take the West Rogueport entrance to the sewers (through the grate) and head right across the platforms. In the underground city, enter the building to the left and ground pound near the table to find Star Piece #39. From here, head back to the room to the left and enter the pipe to go down a floor. Head to the left and down the staircase and you'll see a paper that you can blow away with Flurrie's gust. This reveals a pipe that serves as another entrance to the Pit of 100 Trials.

Enter the pipe and then exit the trial room to the right. You'll be on sublevel three in the Thousand Year Door room. Before presenting your Crystal Star, you can actually ground pound in the center front of the room to find Star Piece #40. You can then take your Crystal Star to the door. This will reveal the location of the next Crystal Star on your map.


You'll be taken to Professor Frankly's house where he suggests that your map is referring to the floating town of Glitzville. He also tells you that there is a blimp that will take you there, if you can manage to get a ticket. He hints that Don Pianta is the only way to get one.

Before investigating that further, there are a few more optional things to pick up and complete. We'll need to back track to previous areas to pick up a few remaining star pieces. The first is back at Flurrie's House, so you may want to combine this trip with the "Life Mushroom!" trouble center quest below. Head down into the warp pipe room from the central Rogueport pipe. When you do, a new warp pipe to Boggly Woods will be added. Go ahead and take it.
You'll find yourself outside of the Great Tree, so go ahead and enter it to complete the Puni Elder's quest if you're doing that as well. Exit the tree area and head right through Boggly Woods back towards Flurrie's house. You'll need to use the airplane panel again to reach the higher area to the right. Once inside Flurrie's house, enter her bedroom and ground pound to the left of her vanity to find Star Piece #41.

While in her room, you can also open the chest to find a Super Appeal P badge. Now backtrack all the way to the Great Tree and go back to the warp pipe room. Now take the warp pipe back to Petalburg so we can collect the remaining star pieces in this area. Start by going to the grassy area on the far east side of town, but north of the river. Ground pound in the grass here to find Star Piece #42.

Head to the west side of town and visit the grassy area south of the river. Ground pound next to the flower bulb character to find Star Piece #43. Now continue west out of Petalburg towards Hooktail Castle. Navigate right through the first floor of the castle all the way to the room with jail cell bars. Use your paper mode ability to slip through the first set of bars and ground pound to the left to find Star Piece #44 in a hidden floor panel.

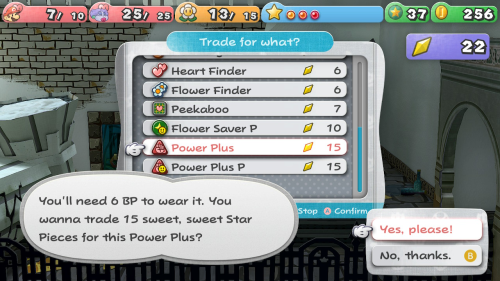
If you've been following along so far you can check your map and see that you should now have 100% completion for Star Pieces and Shine Sprites in all of the Chapter 1 and Chapter 2 areas (besides Rogueport). We've collected nearly half the star pieces in the game, so there should be a little less backtracking to do going forward. You can now return to Rogueport and finish out the trouble center quests if you'd like. You should also consider paying a visit to Dazzle in the sewers to spend some of the star pieces we've been collecting. Flower Saver and Power Plus are strong options if you can spare the BP.

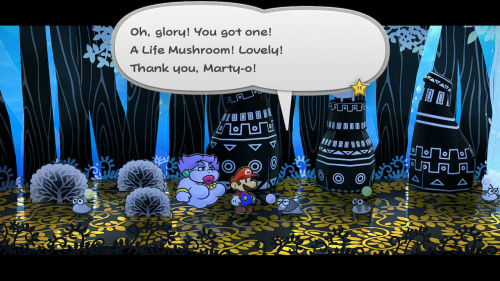
To complete this quest you'll need to bring the Puni Elder a Life Mushroom. He can be found in the first room of the Great Tree. You can use the new warp pipe to get very close. If you don't have a Life Mushroom, you can buy one from the shop in West Rogueport. You'll get 50 coins as a reward.

For this quest, Lahla the Boo wants you come play some games at the Pianta Parlor in West Rogueport. All you need to do is go speak to her at the desk and she'll give you 10 pianta tokens.

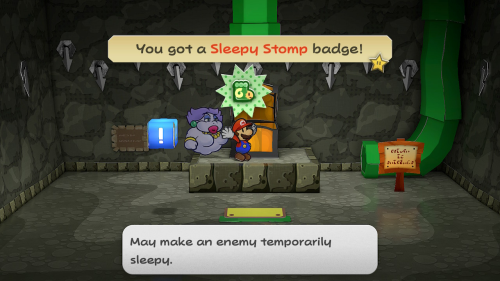
This next quest is quite involved, so feel free to wait until later to take it on. Pine T. Jr. says his daddy is missing in the Pit of 100 Trials and needs you to rescue him. In order to do so you'll need to make your way down to Level 18 of the pit, defeating all the enemies along the way. When you reach Level 10 for the first time, you will get the Sleepy Stomp badge from a chest.

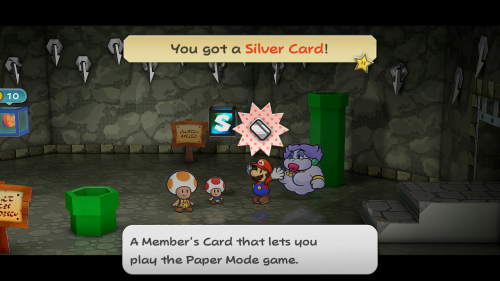
When you get to Level 18 you will find Pine T. Sr. lying on the ground. After defeating the enemies on this level, speak to him and he'll ask you to show him the way out. You'll need to continue down to Level 20 before you are able to exit with him. When you reach that level he will automatically exit and you can choose to keep going or not. You can also get the Fire Drive badge from a chest on this level. Use the exit pipe to go back to the top of the pit where you can speak to Pine T. Jr. & Sr. As a reward you will the Silver Card, which lets you play the Paper Mode game in Pianta Parlor.

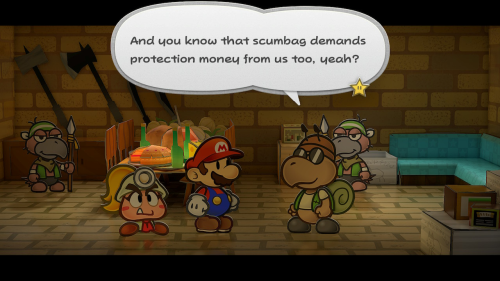
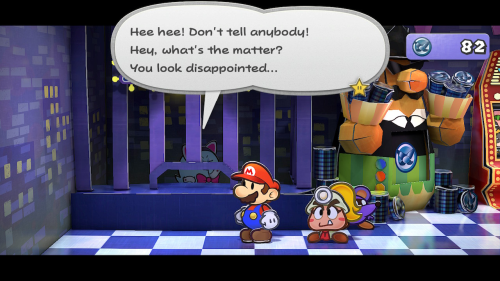
With all the goodies and extras gathered, we can now continue with the main story. We need to find Don Pianta, but he isn't an easy man to get ahold of. If you visit the Robbo Thieves hideout in East Rogueport by sneaking through the small gap between buildings you can get a hint on what to do next. When you speak to Ishnail in here you can pay him 64 coins to tell you the secret. You must go to the store in West Rogueport and buy a Dried Shroom and then a Dizzy Dial. When asked your favorite color, you must respond "Yellow". Now that we've shared that information (no coins required), you don't actually need to pay Ishnail.

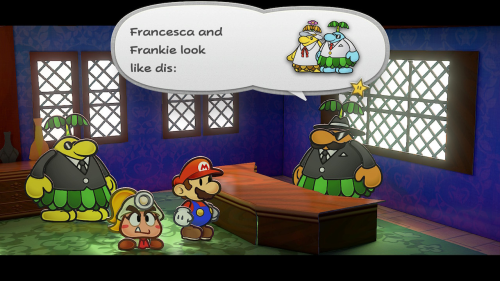
Head to the store in West Rogueport and follow the instructions above. After purchasing the items and answering the question Peeka the Boo will open the door on the left side of the shop for you. There is a staircase back here that leads to another building where you'll find Don Pianta and a couple bodyguards. Speak to the Don and he'll ask you to find his daughter and a man she is eloping with in exchange for a blimp ticket.

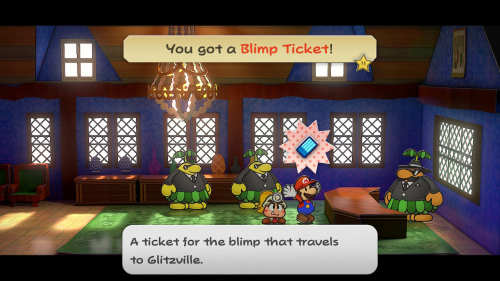
You can find his daughter Francesca and her boyfriend Frankie at the docs on Rogueport Harbor about to leave town. They will go on about their love for each other and wrestle about what to do. After speaking to them, go back to Don Pianta and report your findings. The two will burst in and confess what they've done. After a rather sappy cutscene where Don Pianta sort of gives his blessing, they'll run off and elope. As promised, you'll also get your Blimp Ticket.

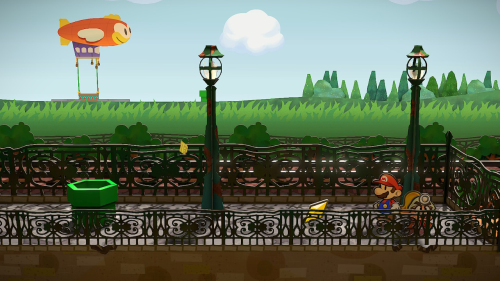
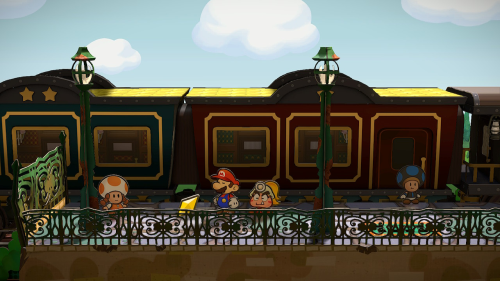
With the ticket in hand, we can make our way over to the blimp. It can be found to the north of West Rogueport at the train station. Speak to the blimp conductor Steward to the right of the train and show him your ticket. Before entering the pipe, head to the right a bit and ground pound between the light poles. You will find Star Piece #45 in a hidden floor panel. You can then enter the pipe and board the blimp.
Back to Chapter 1: Castle and Dragon | Continue to Chapter 3: Of Glitz and Glory
